Graphene Floor Heating Installation
2025-08-25 22:06:15
In the realm of modern home heating solutions, graphene floor heating has emerged as a game-changer, offering unparalleled efficiency and comfort. This innovative technology is transforming the way we think about keeping our living spaces warm and cozy.
Pre-Installation Preparation and Planning
①Site Assessment and Environment Check
Before initiating graphene floor heating installation, a comprehensive site assessment is essential. First, evaluate the condition of the subfloor—ensure it is flat, dry, and free of cracks or uneven surfaces. Use a level tool to check for deviations; any irregularities exceeding 3mm per 2m should be corrected with self-leveling mortar to prevent damage to the heating film. Next, verify the environmental conditions: the installation area must have a relative humidity below 85% to avoid moisture-related issues during and after installation. Additionally, confirm the absence of flammable, explosive, or corrosive gases and conductive dust, as these can compromise system safety and performance.
②Material and Tool Preparation
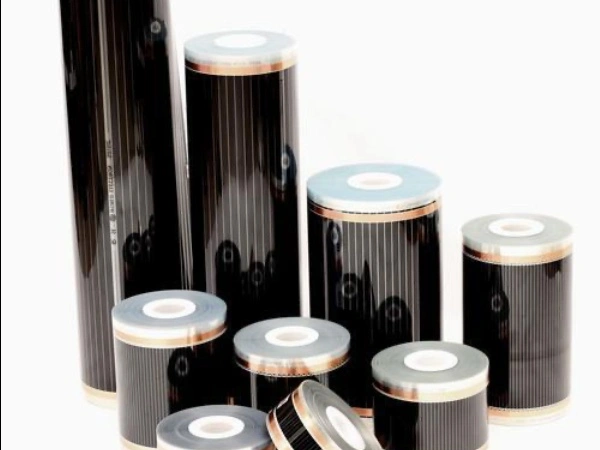
Gather all necessary materials and tools before starting. Core materials include graphene heating films (check specifications such as voltage, power, and dimensions against project requirements), insulation boards (preferably XPS or EPS with a thickness of 20–30mm for heat retention), reflective aluminum foil (to enhance heat reflection upward), tape for securing films and insulation, and a microcomputer smart thermostat compatible with the heating system. Required tools include a utility knife for cutting films and insulation, a ruler and marker for measurement, a multimeter for electrical testing, a heat gun (if needed for sealing connections), and personal protective equipment such as gloves and safety glasses.
③Layout Design and Load Calculation
Develop a detailed layout design based on the room's dimensions and usage. Mark areas where heating films will be installed, avoiding zones covered by heavy furniture or fixtures that may block heat distribution. Calculate the total heating load required for the space, considering factors like room size, insulation quality, and local climate. This ensures the selected graphene heating films (with appropriate power density, typically 100–150W/m²) can meet heating demands efficiently. Also, plan the positioning of the thermostat and power supply, ensuring easy access and compliance with electrical safety standards (e.g., keeping the thermostat at a height of 1.2–1.5m from the floor).
With thorough preparation and planning completed, the installation process can proceed systematically. The following section outlines the step-by-step procedures for installing graphene floor heating, from subfloor preparation to film placement and connection.

Step-by-Step Installation Procedures
①Subfloor Preparation and Insulation Laying
Begin by cleaning the subfloor thoroughly, removing dust, debris, and any protruding objects. If the subfloor is concrete, ensure it is fully cured (at least 28 days) to prevent moisture migration. Next, lay the insulation boards across the entire subfloor, fitting them tightly together to minimize heat loss. Use tape to seal the seams between boards, creating an airtight barrier. Cover the insulation with reflective aluminum foil, securing it with tape to ensure full coverage. This layer reflects radiant heat upward into the room, improving energy efficiency by reducing heat absorption into the subfloor.
②Graphene Heating Film Placement and Fixing
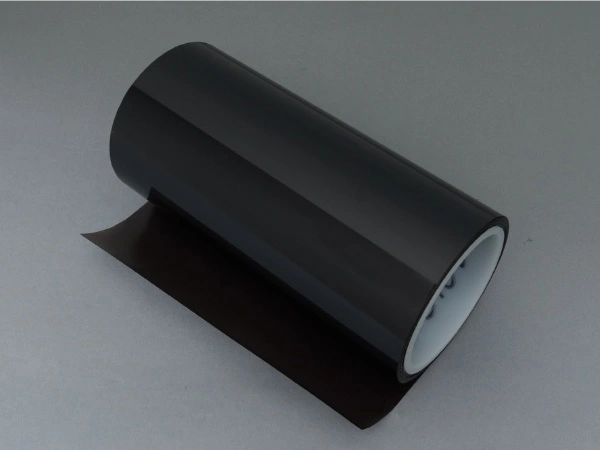
Unroll the graphene heating films carefully, avoiding folding or creasing, as this can damage the internal conductive elements. Position the films according to the pre-designed layout, ensuring they are parallel and spaced evenly (typically 5–10cm apart, depending on heating requirements). Do not overlap the films, as this may cause overheating. Secure the films to the reflective foil using heat-resistant tape along the edges, ensuring they lie flat without tension. Cut the films to size if necessary, using a utility knife and following the manufacturer's marked cutting lines to avoid damaging the conductive strips. Leave a 5–10cm gap between the films and walls to accommodate expansion and prevent heat accumulation near edges.
③Electrical Connection and Thermostat Installation
Connect the heating films to the power supply using approved junction boxes and cables. Strip the film's outer insulation carefully to expose the conductive terminals, then connect them to the junction box following the manufacturer's wiring diagram—ensure proper polarity (live, neutral, and ground connections). Seal all connections with waterproof insulation tape to meet IP67 waterproof standards. Run the main cable from the junction box to the thermostat location, concealing it in a conduit if installed in a finished space. Mount the thermostat on the wall, connect the cable to its terminals, and test the electrical continuity using a multimeter to confirm no short circuits or open connections exist before proceeding.
④Floor Covering Installation
After verifying electrical connections, install the floor covering over the heating films. Suitable materials include laminate, vinyl, engineered wood, or tile—avoid thick carpets (over 10mm) as they can insulate heat and reduce efficiency. For floating floors (laminate or vinyl), lay them directly over the heating films without gluing or nailing into the subfloor, to prevent damage. For tile floors, apply a thin layer of self-leveling mortar over the films to create a smooth surface before tiling, ensuring the mortar does not exceed 5mm in thickness to avoid heat loss. Allow all adhesives or mortars to cure completely before energizing the system.
Once the physical installation is complete, the system requires rigorous testing and commissioning to ensure optimal performance and safety. The final section covers these critical post-installation steps and ongoing maintenance guidelines.

Post-Installation Testing, Commissioning, and Maintenance
①System Testing and Safety Verification
Before full operation, conduct a series of tests to verify system functionality. First, perform a visual inspection to ensure all films are properly positioned, connections are secure, and no damage occurred during floor covering installation. Use a multimeter to check resistance values across the heating films—readings should match the manufacturer's specifications (typically 10–50 ohms, depending on film size). Next, energize the system at 50% power using the thermostat for 30 minutes, then use an infrared thermal imager to scan the floor surface. This detects uneven heating patterns, which may indicate installation issues like overlapping films or poor connections. Finally, perform a leakage current test to ensure values are ≤0.25mA, confirming compliance with safety standards.
②Commissioning and User Calibration
Calibrate the thermostat to optimize performance. Set the desired temperature range (typically 18–26°C) and program timing functions if applicable, such as scheduling heating periods to align with occupancy patterns. Test the thermostats response by adjusting temperatures and verifying that the system activates and deactivates correctly. Run the system at full power for 24–48 hours to ensure stable operation, monitoring for any unusual odors, noises, or temperature fluctuations. Provide users with operational guidelines, including how to adjust settings, troubleshoot minor issues, and maximize energy efficiency (e.g., using zoning controls to heat only occupied areas).
③Long-Term Maintenance and Troubleshooting
Graphene floor heating systems require minimal maintenance but benefit from regular checks. Inspect the thermostat annually to ensure accurate temperature readings and replace batteries if applicable. Every 2–3 years, use a thermal imager to scan the floor surface for any changes in heat distribution, which may signal film degradation or connection issues. Avoid placing heavy objects (over 50kg/m²) on the floor for extended periods, as this can compress the films and reduce efficiency. In case of issues like uneven heating, first check the thermostat settings and power supply; if problems persist, contact a professional technician to inspect connections or test film integrity. Never attempt to repair damaged films or connections without manufacturer authorization, as this may void warranties and compromise safety.
Ready to experience the future of heating in your home or business? Contact Shengxihong Science and Technology today to learn more about their graphene floor heating systems and how they can transform your space. Reach out via email at 1315363763@qq.com to discuss your heating needs and discover the perfect solution for your project.
References
- JG/T 286-2010, "Low-Temperature Radiant Electric Heating Film", China Building Materials Industry Standard.
- Shaanxi Shengxihong Science and Technology Co., Ltd., "Graphene Heating Film Installation Manual".
- National Electrical Code (NEC), NFPA 70, Guidelines for Electrical Installations in Floor Heating Systems.
- International Organization for Standardization (ISO), ISO 13787:2017, "Thermal Performance of Electric Floor Heating Systems".
- Underfloor Heating Manufacturers Association (UHMA), "Best Practice Guide for Electric Underfloor Heating Installation".
